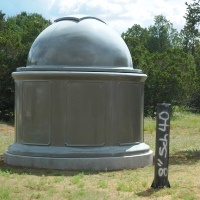
Observatory
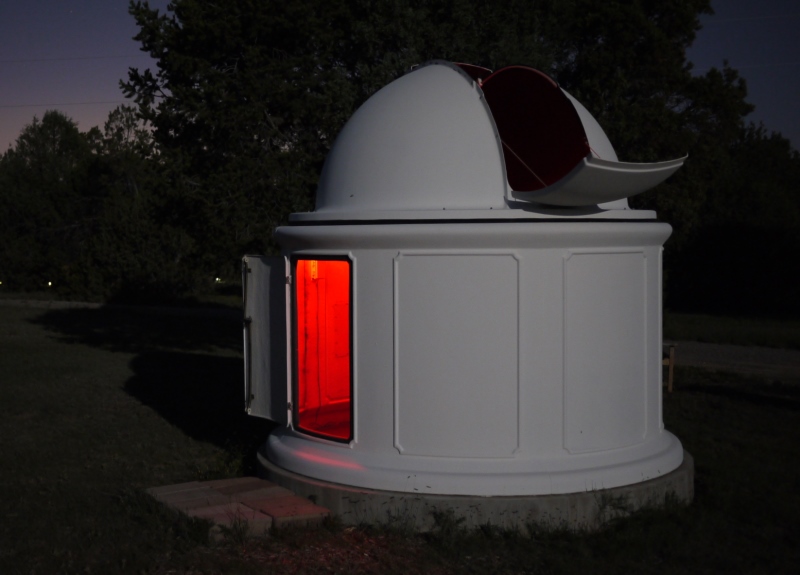
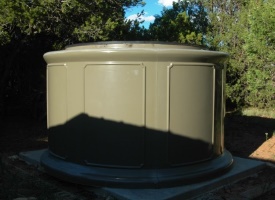
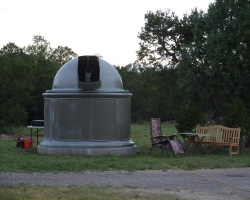
We have a small observatory that is great for astrophotography and for observing by one or two people. Any more that that and it gets a bit crowded. The observatory is from Clear Skys and is made of fiberglass.
The observatory was given to us by a friend after it was hit by lightning and he got a new one.
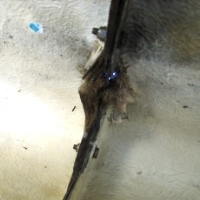
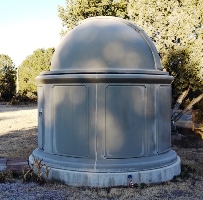
I believe that at least two lightning strikes hit the observatory. As shown in the first picture on the left, one blew out one of the seams where the base panels are joined together. This is the worst of the damage as the seam is a structural part; the four seams are mainly responsible for supporting the dome. We made a temporary brace out of scrap wood but we intend to make it stronger and look better.
The second picture shows another lightning entry through the horizontal surface that the dome rolls on. Currently, this is sealed with automotive exhaust repair tape. As soon as I learn how to do fiberglass, I'll patch it properly.
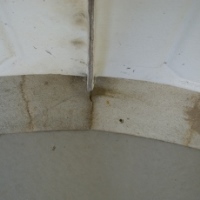
The last picture shows two rips in the flange at the bottom of the observatory base. The lightning travelled down the dome and blew out a 6 inch chunk of concrete in the old observatory pad. This damage is not an issue as it simply sits flat on our new pad.
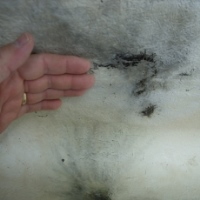
Additionally, every wire that our friend had run for LED lighting and communications
was vaporized, leaving black char lines on the inside of the observatory. It looks
kind of cool--I don't know if we are going to paint over it or not.
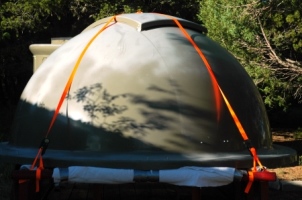
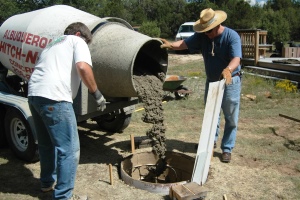
In August, 2009, we got a couple of helpers together and loaded it onto a trailer. We had to split it into two trips--one for the base, a 9½ ft. cylindrical base and the 8 ft. dome. It took lots of straps and a bit of creativity to secure everything so that the pieces would stay on the trailer and not bounce, flex, or shift.
We braced the inside of the base with two sets of two 2x4's pinned in the middle like a big + sign and supporting the four edges where the base panels are joined. Everything worked and nothing broke!
It sat there for quite a while until we got a pier footing and pad poured.
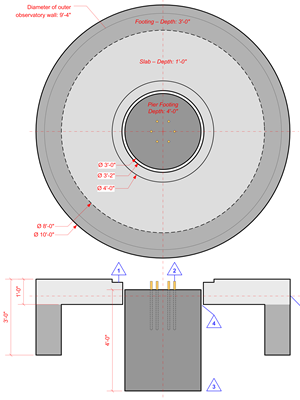
A couple of days after we got the observatory on site, it was time to start construction of the pier footing and observatory pad. As usual, the footing would be isolated from the pad to prevent vibrations being transferred between activity in the observatory and the telescope on the pier. Experience from from the observation deck told us that we needed more mass--even though its pier is also isolated, moving on the deck causes vibrations in the scope. I figured that increasing the mass of both foundation pieces would prevent that from happening in the observatory.
The frost line at our location is technically 36 inches. In reality, I think it's probably closer to 18. If you dig down 6 inches, the dirt is bone dry pretty much all year except during monsoon season, July through September. Still, just to be safe, we used the 36 inches.
The pier footing is 3 ft in diameter and 4 ft deep, giving it a volume of a little over a cubic yard--about 3000 lbs of concrete. The pad ended up at almost 5 cubic yards--over 14000 lbs of concrete. I figured that walking around on the pad would have no effect on a telescope mounted on the pier. This turned out to be true as long as I walk softly.
Experience also told us that there is little point in trying to take photos
West of the meridian. Albuquerque's light dome is considerable, even 20
miles away with 11000 ft mountains in between. So, we located the observatory
for viewing South, East, and North. The tree just to the west does not
really interfere as we rarely point that way.
Pier Footing Timeline:
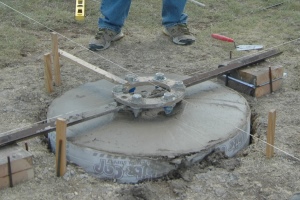
The pier footing turned out well. The form could have been in better shape--it was slightly damaged when purchased and one edge collapsed a little, but it did not affect the usability of the footing.
The six pier bolts are 18 inch long pieces of 1 inch all thread. They are wired into the rebar cage in the concrete and were held in place by a wood template matching the pier's bottom plate. They turned out to fit perfectly.
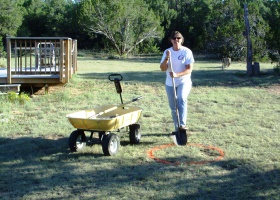
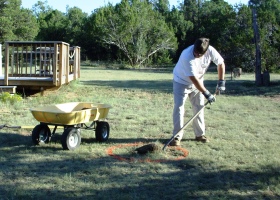
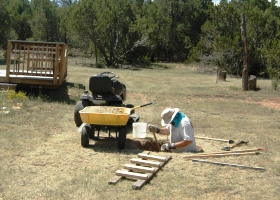
If you are wondering why there is no dirt in any of the pictures, it is because we dumped it into that yellow wagon and hauled it to where we needed to do some flood and erosion control on our property. It made for a rather neat work area, as opposed to my normally messy work areas.
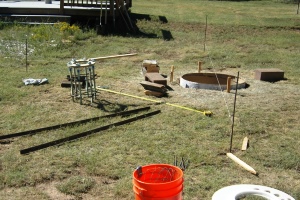

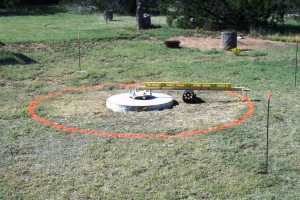
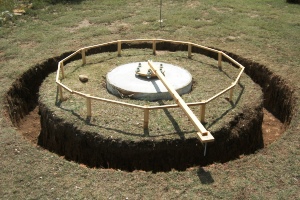
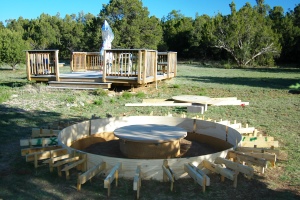
To make a reference for the slab, we put a radius pin at the center of the pier footing. All measurements for the slab were measured from that point. The first picture, above, shows the mark for the outer edge of the slab. The second picture shows a series of stakes and crossbars that ensure that the radius 2x4 is level all the way around the slab so that we can easily measure the depth of the footing as we dig it. When we finished the footing, we removed the stakes and crossbars and dug that to get our 10 inches of depth.
After the near disaster, averted by Gordon, pouring the footing, we were well aware that we should get a professional to do the slab. David Rue is a fantastic concrete guy and usually does decorative stamped concrete. Fortunately for us, he agreed to do our slab.
Observatory Slab Timeline:

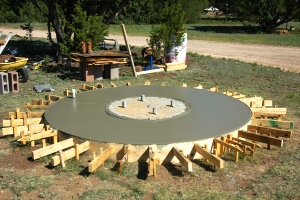


So, finally, a week later, a couple of friends, Ben and Mark, came over and we moved the observatory on to the pad. The base is a little over 100 pounds and the dome is a little under 100 pounds. So it was not too heavy to move, it was just really big and bulky. Anyway, we got it in position and then David came back out and installed anchor bolts. We now had an empty observatory!
The pier came from Troy's Welding, in Albuquerque, the same company that made the one we have on the observation deck. We had to wait until the dome was in place before we ordered the pier because we didn't know exactly how high it would need to be until the dome was in place. So, on June 25 2009, we painted the pier and then installed it a couple of days later.
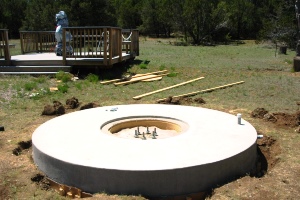
We made a wooden collar to bridge the gap from the slab almost to the pier. There is a 1 inch gap between the collar and the pier itself. In the third photograph, above, you can see the black traces where wires were vaporized in the lightning strike.
On July 3, we had first light from the dome! We've been loving it ever since.
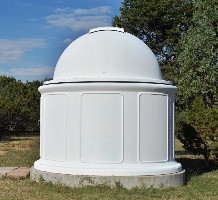
After about 3 years of talking about it, we finally painted the observatory. It is made of fiberglass and was getting quite hot in the New Mexico sun. On a summer afternoon, the outside surface would get too hot to touch and the inside would be well over 100°F.
We chose a rubberized titanium oxide based roof paint. We used a very similar type paint on the shed roof years before and reduced the inside shed temperature over 15°, so we were pretty sure it would work. A couple of days, 5 gallons, and several coats of paint later, the observatory looked quite a bit better and was much, much cooler inside. It now tracks within a degree or two of ambient temperature even on the hottest, sunniest day. We are very happy with the way it turned out.
We also put a rubber floor in. We got a bunch of rubber exercise floor tiles from Walmart. A little bit of cutting and fitting and we had a nice comfortable floor that will reduce foot and back fatigue and help a dropped eyepiece survive. Unfortunately, the tiles are rather fragile and we already have several rips in them just from moving around. When these wear out, we will probably replace them with horse stall mats, a much heavier duty rubber material that should last for a long time.
Next up will be some additional repairs to the lightning damaged seam. We will also reinforce the other seams, the goal being to cause the dome support surface to slant slightly outward. Currently, whenever it rains water pools under the dome rollers. When it gets cold, that water freezes and we have to break the dome free to rotate it. We want to adjust the geometry so that water will drain off instead of pooling.
We also have a small problem when we get heavy rain from the South: a water leak around the door. We tried to seal it with pipe insulation, but that has not worked well, so we need to come up with a better solution. We don't know what that solution is yet.